Pressure Canning: The Ultimate ‘How To’ Guide For Beginners
If you are just becoming interested in pressure canning but not sure where to begin or how to do it, this step-by-step guide will help learn where and how to begin canning low acid foods. The best way to learn how to use a pressure canner involves learning what foods you can pressure can, which foods to avoid pressure canning, learn the parts of a pressure canner, learn about processing times by food and the correct pressures to use, and following a thorough step-by-step beginner guide to pressure canning.
A Beginners/Dummies Step-By-Step Guide to follow when Pressure Canning
As suggested by the National Center for Home Food Preservation
What you’ll need
- Pressure canner and all canner equipment (jump down the page to learn about the parts of a pressure canner)
- Stove or heat source
- Mason Jars with lids and sealing ring bands
- Food (jump down the page to see what foods you should pressure can)
- Pot to boil water (this is used to fill mason jars that have food in them)
- Glass measuring cup or ladle
- Towel or cloth to place mason jars on
1. Check, Clean, & Assure Pressure Canner Equipment is Working
Make sure that you are familiar with and have all of the correct equipment and the pressure canner is working properly before canning any food. Follow the manufacturer’s directions in cleaning the canner and make sure all vent pipes are clear and contain no trapped material or mineral buildup. Center the canner over the burner and assure that it is level. Your pressure canner can be damaged if the burner puts out too much heat. In general, do not use an outdoor LP gas burner or gas range burner over 12,000 BTU’s. Check your manufacturer’s directions for more information about appropriate burners.
Jump down in this guide to learn the parts of a pressure canner.
2. Place rack and water into the canner and begin to warm up
How much water do you put in a pressure canner?
- If the amount of water is not specified with a given food, use enough water so it is 2 to 3 inches high in the canner.
Can you put too much water in a pressure canner?
- Too much water is unlikely to harm your canned goods, but putting to little water in your canner could boil dry and that would be a big problem.
Do you cover jars with water when pressure canning?
- When using a pressure canner, the jars do not need to be covered with water like they do when using a water bath canner.
Longer processes required more water. Some specific products (for example, smoked fish) require that you start with even more water in the canner. Always follow the directions with USDA processes for specific foods if they require more water to be added to the canner.
3. Fill glass Mason jars with food that you wish to pressure can
- Headspace in your jars should be about 1 inch.
- See below What Foods you Should Pressure Can
4. Use a separate pot to boil water, then use a measuring cup or ladle to fill Mason jars that already have food in them
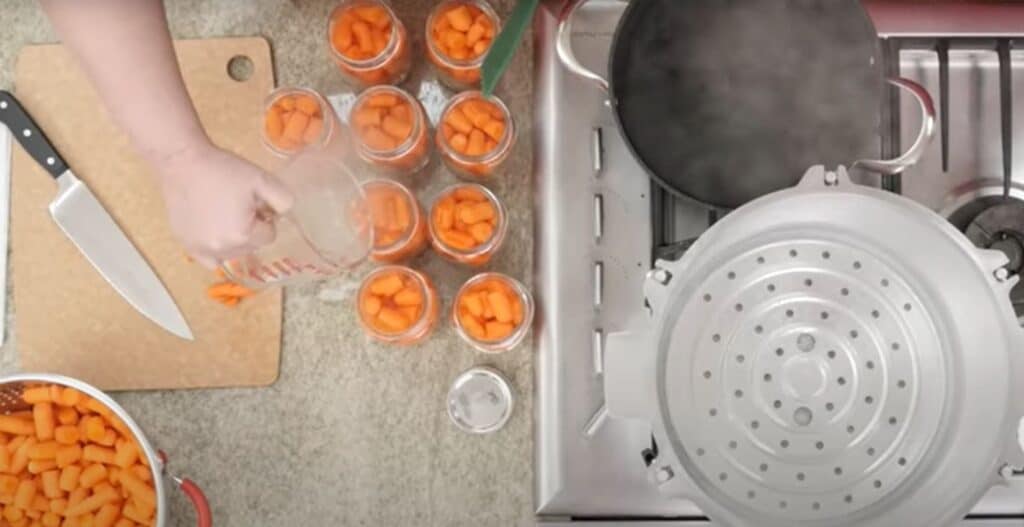
Remember to leave about 1 inch of headspace before fitting with lids and ring bands.
If you are looking for a good set of mason jars check our this 32 oz (1-quart) wide mouth set of 12 jars on Amazon.
Or if you need smaller mason jars check out this 16 oz (1-pint) set of 12 jars on Amazon.
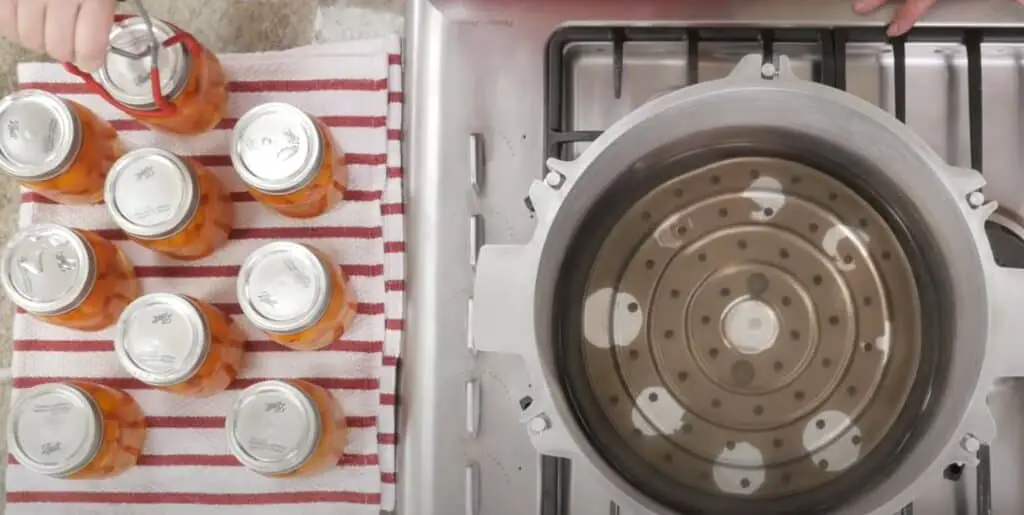
5. Place filled jars, fitted with lids and ring bands, on the jar rack in the canner, using a jar lifter.
- Tighten ring bands to fingertip tight.
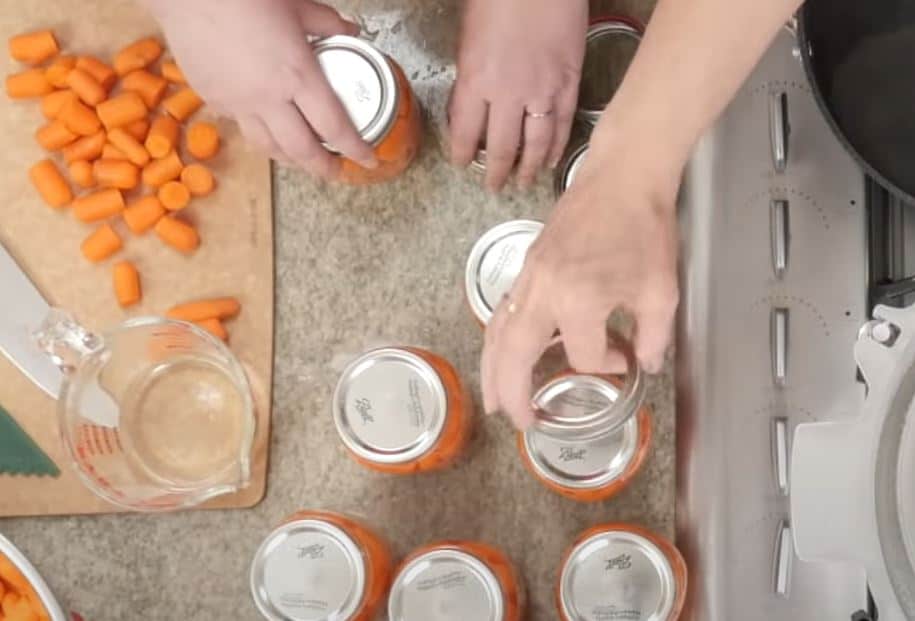
When moving jars with a jar lifter, make sure the jar lifter is securely positioned below the neck of the jar (below the ring band of the lid). Keep the jar upright at all times. Tilting the jar could cause food to spill into the sealing area of the lid.
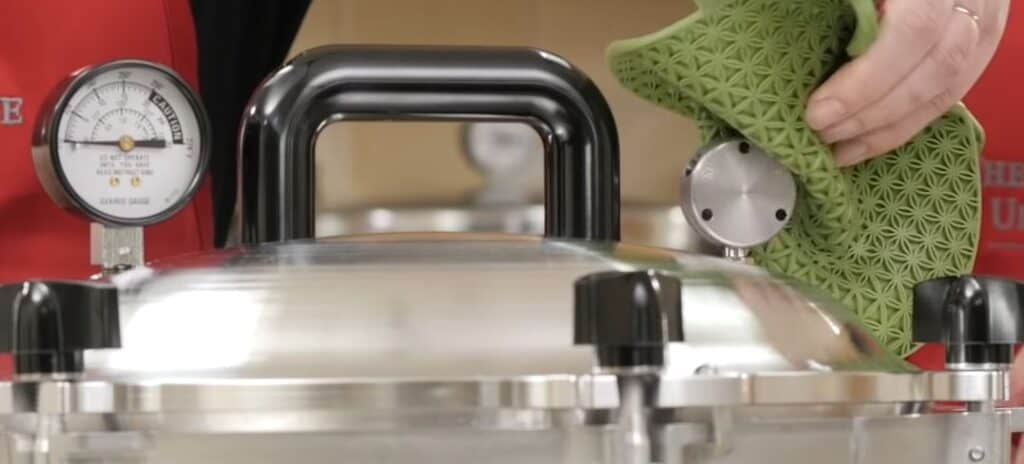
6. Securely close and fasten the pressure canner lid
- Tighten handles on opposite sides at the same time to secure the lid evenly to the canner body.

Make sure you initially leave the weight off of the vent pipe or make sure the petcock is open.
7. Turn up the heat
- Turn the heat setting to its highest position.
- Heat until the water boils and steam flows freely in a funnel-shape from the open vent pipe or petcock.
- While maintaining the high heat setting, let the steam flow (exhaust) continuously for 10 minutes.
8. Place the counterweight or weighted gauge on the vent pipe, or close the petcock.
- The canner will pressurize during the next 3 to 10 minutes.
9. When the correct (recommended) pressure on the dial gauge has been reached in the canner start timing the canning process.
For canners that don’t have a dial gauge, you can start timing it when the weighted gauge begins to jiggle or rock because of the pressure.
- See the Processing Time and Pressure Charts below
10. Regulate the heat under the canner to maintain a steady pressure at, or slightly above, the correct gauge pressure
One type of weighted gauge should jiggle a certain number of times per minute, while another type should rock slowly throughout the process – check the manufacturer’s directions.
- Loss of pressure at any time can result in underprocessing, or unsafe food.
- Quick and large pressure variations during processing may cause unnecessary liquid losses from jars.
*Important: If at any time pressure goes below the recommended amount, bring the canner back to pressure and begin the timing of the process over, from the beginning (using the total original process time). This is important for the safety of the food.
11. When the time is up, turn off the heat, remove the canner from the heat (electric burner) if you can do so, and let the canner cool down naturally.
Lift the canner to move it; do not slide the canner. It is also okay to leave the canner in place after you have turned off the burner. It is better to do so than to let jars inside the canner tilt or tip over if the canner is too heavy to move easily.
While the canner is cooling, it is also de-pressurizing. Do not force cool the canner.
- Forced cooling may result in food spoilage.
- Cooling the canner with cold running water or opening the vent pipe before the canner is fully depressurized are types of forced cooling.
- They will also cause loss of liquid from jars and seal failures.
- Forced cooling may also warp the canner lid.
Be careful!
Wait until the dial gauge reads zero pounds of pressure before removing the weight from the vent pipe. Tilt the weight slightly to make sure no steam escapes before pulling it all the way off. Newer canners will also have a cover lock in the lid or handle that must release after cooling before the lids are twisted off. Do not force the lid open if the cover locks are not released. Use the manufacturer’s instructions they will give you more information for particular models.
Depressurization of older canner models without dial gauges should be timed. Standard-size heavy-walled canners require about 30 minutes when loaded with pints and 45 minutes when loaded with quarts. Newer thin-walled canners cool more rapidly and are equipped with vent locks that are designed to open when the pressure is gone. These canners are depressurized when the piston in the vent lock drops to a normal position. Some of these locks are hidden in handles and cannot be seen; however, the lid will not turn open until the lock is released.
12. Once the canner is completely depressurized, then remove the weight from the vent pipe or open the petcock.
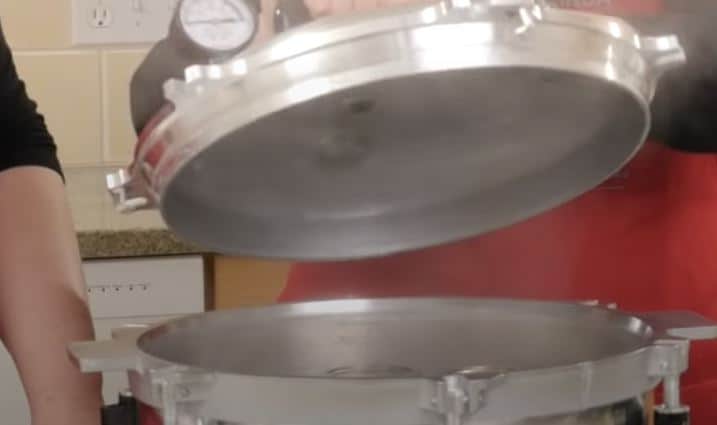
- Wait 10 minutes; then unfasten the lid and remove it carefully.
- Lift the lid with the underside away from you so that the steam coming out of the canner does not burn your face.
13. Using a jar lifter, remove the jars one at a time
- Being careful not to tilt the jars.
- Carefully place them directly onto a towel or cooling rack, leaving at least one inch of space between the jars during cooling.
- Avoid placing the jars on a cold surface or in a cold draft.
14. Leave the jars to cool for 12 to 24 hours
- Don’t mess with them.
- Do not tighten ring bands on the lids or push down on the center of the flat metal lid until the jar is completely cooled.
15. Remove ring bands from sealed jars
Ring bands can be washed and dried and put away for use another time. Put any unsealed jars in the refrigerator and use them first.
16. Wash jars and lids to remove all residues
17. Label jars and store in a cool, dry place out of direct light.
18. Dry the canner, lid, and gasket
Take off removable petcocks and safety valves; wash and dry thoroughly. Follow maintenance and storage instructions that come from your canner manufacturer.
Why Use Pressure Canning to Preserve Food?
Honestly, the first time using a Pressure Canner can be intimidating and even scary. However, despite feeling nervous, pressure canning is actually a safe and economical method of preserving most Vegetables and other low acid foods which has been used for decades—especially by home gardeners and others interested in providing food storage for their families. Also, preserving foods through pressure canning at home also promotes a sense of personal satisfaction and accomplishment. The guess-work is taken out of being able to provide a safe food supply at home when guidelines for operating a pressure canner are followed exactly. Only use tried and tested recipes, procedures, and high-quality equipment and supplies.
What Foods Should You Pressure Can—and Why?
See a fully comprehensive list of What Can and Cannot be Pressure Canned: Complet List
Low Acid Foods
- red meats
- seafood
- Poultry
- fresh vegetables, with the exception of most tomatoes
Low acid foods require a higher temperature when processing than cannot be reached by placing them in jars immersed in boiling water. To kill harmful bacteria (like botulism) the use of a pressure canner ensures the safety of preserved low-acid foods. The above list fits into the low acid group since they have an acidity, or pH level, of 4.6 or higher. The temperature which must be reached and maintained (for a specified amount of time) to kill the bacteria is 240º F. This temperature can be reached only by creating steam under pressure.
What Foods Should you NOT Can in a Pressure Canner?
See a fully comprehensive list of What Can and Cannot be Pressure Canned: Complet List
- Broccoli and Cauliflower
- Cabbage and Lettuce
- Eggplant
- Artichokes
- Olives
- Squash
- Milk
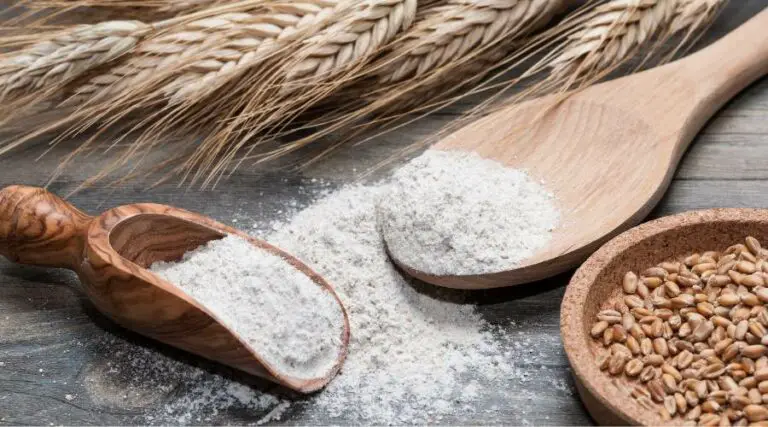
- Grains
- Lard
- Butter, Cheese, and Cream
- Cornstarch and Flour
- Nuts
- Pasta and Noodles
Water Bath Canner
There are several types of food that can be canned in a water bath canner and therefore aren’t necessary to can in a pressure canner. Generally, these foods are higher acidic type fruits and other foods. Including:
- Most fruits, jellies, and jams
- Tomatoes
- Salsa
- Pickles and Relishes
- Pie Fillings and Fruit Sauces
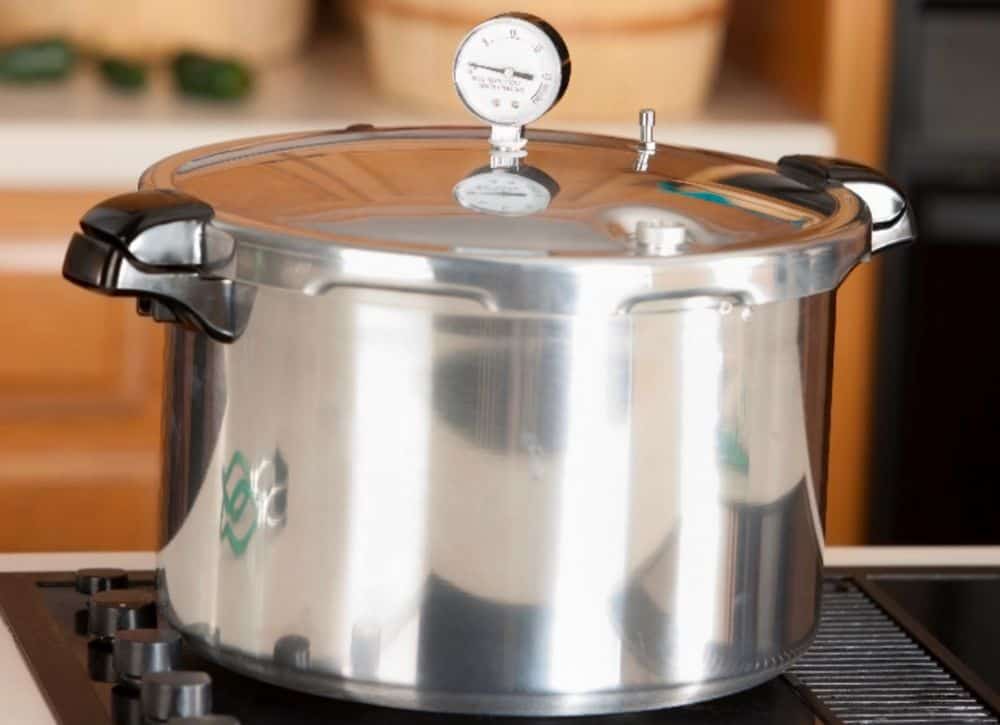
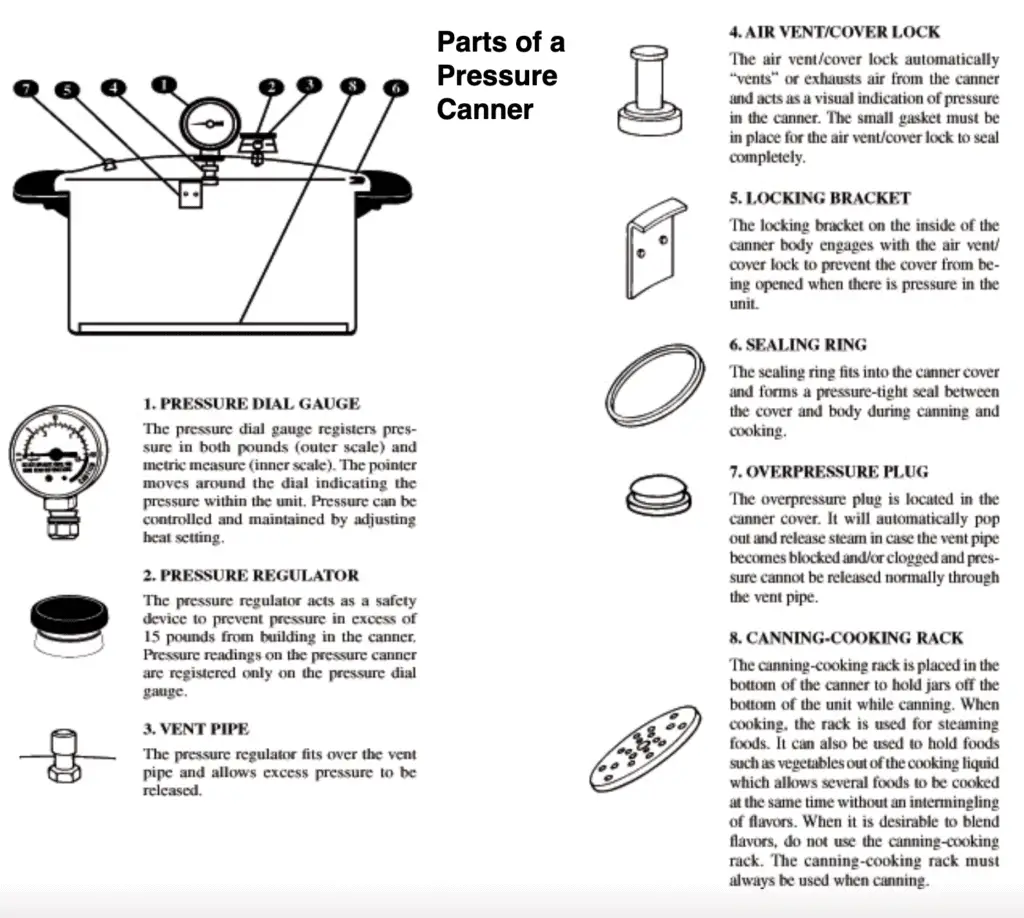
Beginners Need to Learn the Parts of a Pressure Canner
Pressure canners older than 1970’s were heavy-walled kettles with clamp-on or turn-on lids fitted with dial-type gauges. A vent port that opened for venting and closed to build pressure, or a vent port that was covered with a counter weight after venting. A safety fuse (or plug) was also present.
More modern pressure canners are more lightweight, thinner-walled kettles and most have turn-on lids. They usually have:
- Pressure Dial Gauge
- It Registers pressure in both pounds (outer scale) and metric measure (inner scale). The pointer moves around the dial indicating the pressure within the unit. Pressure can be controlled and maintained adjusting heat setting.
- Pressure Regulator
- Acts as a safety device to prevent pressure in excess of 15 pounds from building in the canner. Pressure readings on the pressure canner are registered only on the pressure dial gauge.
- Vent Pipe (a vent port (steam vent) closed with a counterweight or Pressure Regulator)
- The pressure regulator fits over the vent pipe and allows excess pressure to be released.
- Air Vent/Cover Lock
- Automatically “vents” or exhausts air from the canner and acts as a visual indication of pressure in the canner. The small gasket must be in place for the air vent/cover lock to seal completely.
- Locking Bracket
- It is on the inside of the canner body that engages with the air vent/cover lock to prevent the cover from being opened when there is pressure in the unit.
- Sealing Ring (rubber gasket)
- Fits into the canner cover and forms a pressure-tight seal between the cover and the body during canning or cooking.
- Overpressure Plug
- Located in the canner cover. It will automatically pop out and release steam in case the vent pipe becomes blocked and/or clogged and pressure can not be released normally through the vent pipe.
- Canning-Cooking Rack (a metal rack or basket with handles)
- Placed in the bottom of the canner to hold jars off the bottom of the unit while canning. When cooking, the rack is used for steaming foods. It can also be used for holding foods like vegetables out of the cooking liquid which allows for several foods to be cooked at the same time without an intermingling of flavors. The canning-cooking rack should always be used when canning.
*Important: When purchasing a used pressure canner, make certain all parts are accounted for and in good condition. It’s extremely hard to find replacement parts for older models.
Pressure Canning Processing Time and Pressure Charts
It is crucial to follow credible sources of tested and proven processing/cooking times for each type of food that you are canning and adjust for altitude using the table that is below the Pressure Canning times by food table. Keep in mind that failing to follow proper processing times and pressure recommendations may result in spoiled food (mold, bacteria, and other microorganisms) and possibly fatal food poisoning.
Pressure Canning Times by Food Chart
| Food | Jar Size | Canning Time (in Minutes) |
| Asparagus | Pints | 30 |
| Quarts | 40 | |
| Beans – lima | Pints | 40 |
| Quarts | 50 | |
| Beans – green | Pints | 20 |
| Quarts | 25 | |
| Beets | Pints | 30 |
| Quarts | 35 | |
| Carrots | Pints | 25 |
| Quarts | 30 | |
| Corn – Cream Styled | Pints | 85 |
| Corn – Whole Kernel | Pints | 55 |
| Quarts | 85 | |
| Peas | Pints | 40 |
| Quarts | 40 | |
| Peppers | Pints | 35 |
| Potatoes | Pints | 35 |
| Quarts | 40 | |
| Pumpkin and Squash | Pints | 55 |
| Quarts | 90 | |
| Spinach | Pints | 70 |
| Quarts | 90 | |
| Meat | Pints | 75 |
| Quarts | 90 | |
| Poultry – Without Bones | Pints | 75 |
| Quarts | 90 | |
| Poultry – With Bones | Pints | 65 |
| Quarts | 75 |
Pressure Canning Altitude Chart
The steam-pressure method is used for low-acid foods. Normally, the pressure given for low acid foods in canning guides is for weighted-gauge canners at altitudes at or below 1,000 feet above sea level. See the below table to adjust pressure canning for your altitude.
| Altitude (ft) | Pressure Required (lbs) Weighted Gauge | Pressure Required (lbs) Dial Gauge |
| 0-1000 | 10 | 11 |
| 1001-2000 | 15 | 11 |
| 2001-4000 | 15 | 12 |
| 4001-6000 | 15 | 13 |
| 6001-8000 | 15 | 14 |
| 8001-10,000 | 15 | 15 |
Conclusion
Pressure Canning can become a worthwhile and fulfilling pursuit for anyone looking to increase their self-reliance and for those who desire to increase their family’s food storage/supply. As you save money and increase your supply of canned vegetables and other foods you will develop great peace of mind because you will know that you are prepared for whatever the future and bring. Becoming familiar with what foods you can preserve through pressure canning, pressure canning equipment, processing time, pressure, and correct procedures to follow will make you a successful canner and food preserver.